
How to Upcycle Old Furniture Into Beautiful Décor: Simple Ideas to Try
Got an old dresser gathering dust in the garage? Or maybe a coffee table that’s one wobble away from retirement? Don’t toss it just yet. Old furniture isn’t trash—it’s opportunity. With some creativity, paint, and maybe a little caffeine, you can transform those tired pieces into Pinterest-worthy décor. Painting is one of the easiest ways to upcycle, giving old furniture a fresh, customized finish.
I started upcycling years ago when I realized new furniture costs more than my groceries. Plus, it’s satisfying to say, “Oh, this? I made it,” when someone compliments your handiwork. Repurposed furniture and furniture flips are popular ways to give new life to old pieces, turning them into functional and stylish décor.
Every project starts with an idea, sparked by a thrift store find or a forgotten piece you own. Let’s explore how to upcycle old furniture into beautiful décor—without losing your patience (or your fingers).
Key Takeaways
-
Upcycling old furniture is a cost-effective and eco-friendly way to create unique, stylish décor that tells a story.
-
Choosing solid wood pieces with good structure and hidden potential ensures your project will be rewarding and long-lasting.
-
Simple updates like painting, swapping hardware, or repurposing furniture can transform tired pieces into beautiful, functional treasures.
Why Upcycling Furniture Is Worth It
Let’s be real—buying brand-new furniture is convenient, but is it fun? (Spoiler: not really.) Here’s why upcycling is the better deal:
-
You save money. That $15 thrift store chair can look like a $200 boutique piece.
-
You help the planet. Upcycling helps reduce waste by giving old furniture new life instead of sending it to the landfill. Less waste, more style. Win-win.
-
You create one-of-a-kind décor. No awkward moment when you realize your neighbor has the same IKEA bookcase.
-
It’s therapeutic. There’s something oddly calming about sanding wood… unless you sneeze mid-project.
Ever noticed how old furniture carries a story? Upcycling gives it a new chapter while keeping the charm alive. Upcycling gives new life to old furniture, transforming discarded pieces into something fresh and functional. IMO, that’s way better than another flat-pack headache.
How to Choose the Right Piece to Upcycle
Not all furniture deserves a second chance (sorry, three-legged chair). So, what’s worth saving? When choosing a piece of furniture to upcycle, look for solid construction and interesting details that can be highlighted or transformed.
Even if a piece of furniture looks like it's in bad shape, with some effort and creativity, it can often be restored and given new life.
Pro tip: Thrift stores, flea markets, and Facebook Marketplace are treasure troves. Search these places for hidden gems—sometimes the best finds are tucked away and just need a little vision.
1. Solid Structure
Wood pieces—especially real, solid wood—are the MVPs of upcycling. Particleboard? Eh, not so much.
2. Functionality
Ask yourself: Will I actually use this? No point in flipping a fourth side table if your living room already looks like a maze.
3. Hidden Potential
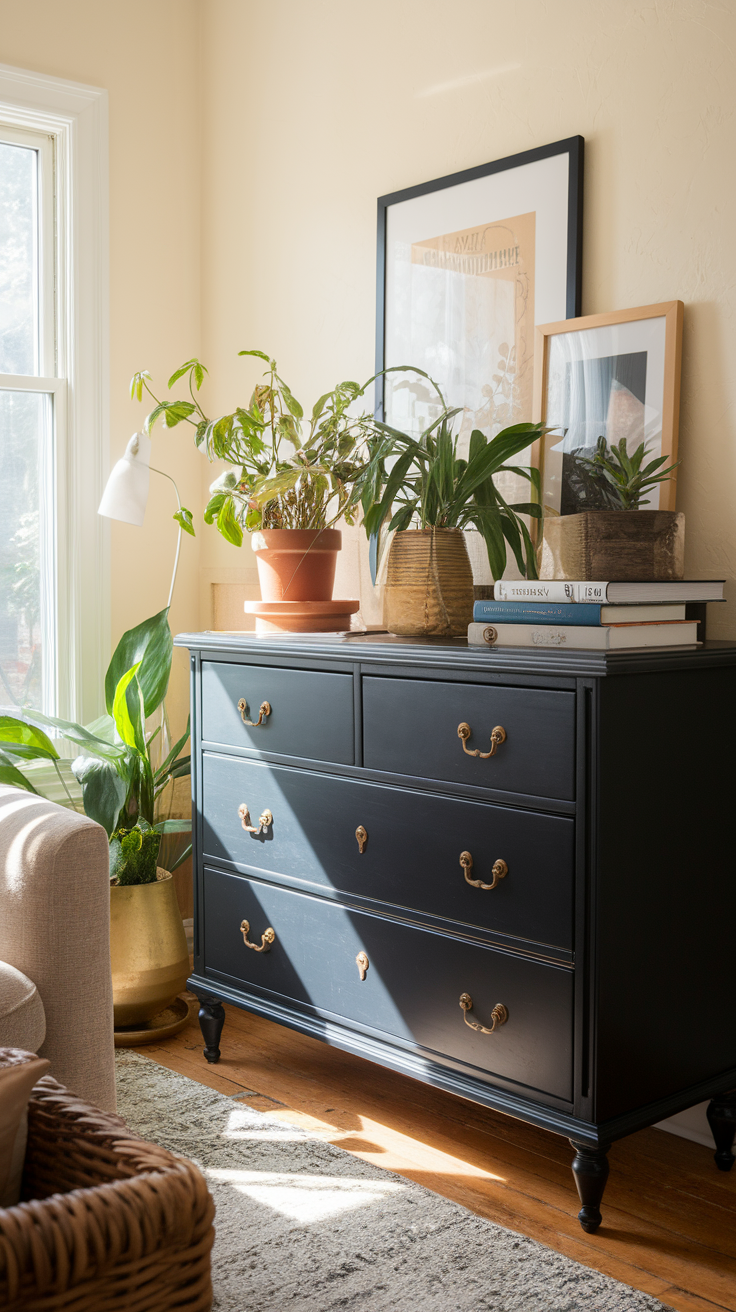
Ugly doesn’t mean useless. With a little creativity, you can transform old, chipped, or outdated furniture into something beautiful and unique. A chipped, outdated dresser can become a statement piece with some paint and new knobs, truly transforming its purpose and look.
Pro tip: Thrift shops, flea markets, and Facebook Marketplace are treasure troves. I once scored a $10 nightstand that turned into my bedroom showstopper.
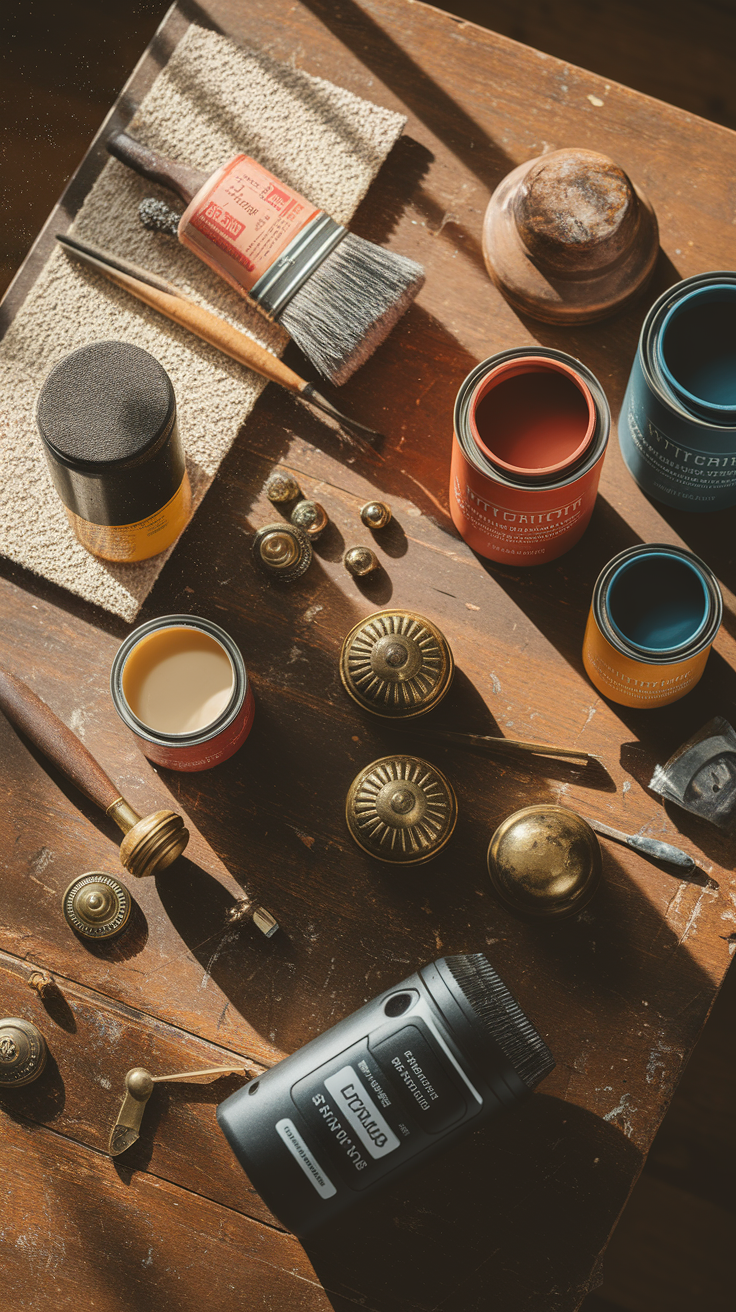
Tools and Supplies You’ll Need
Don’t worry—you don’t need a full workshop to get started. Just a few essentials:
-
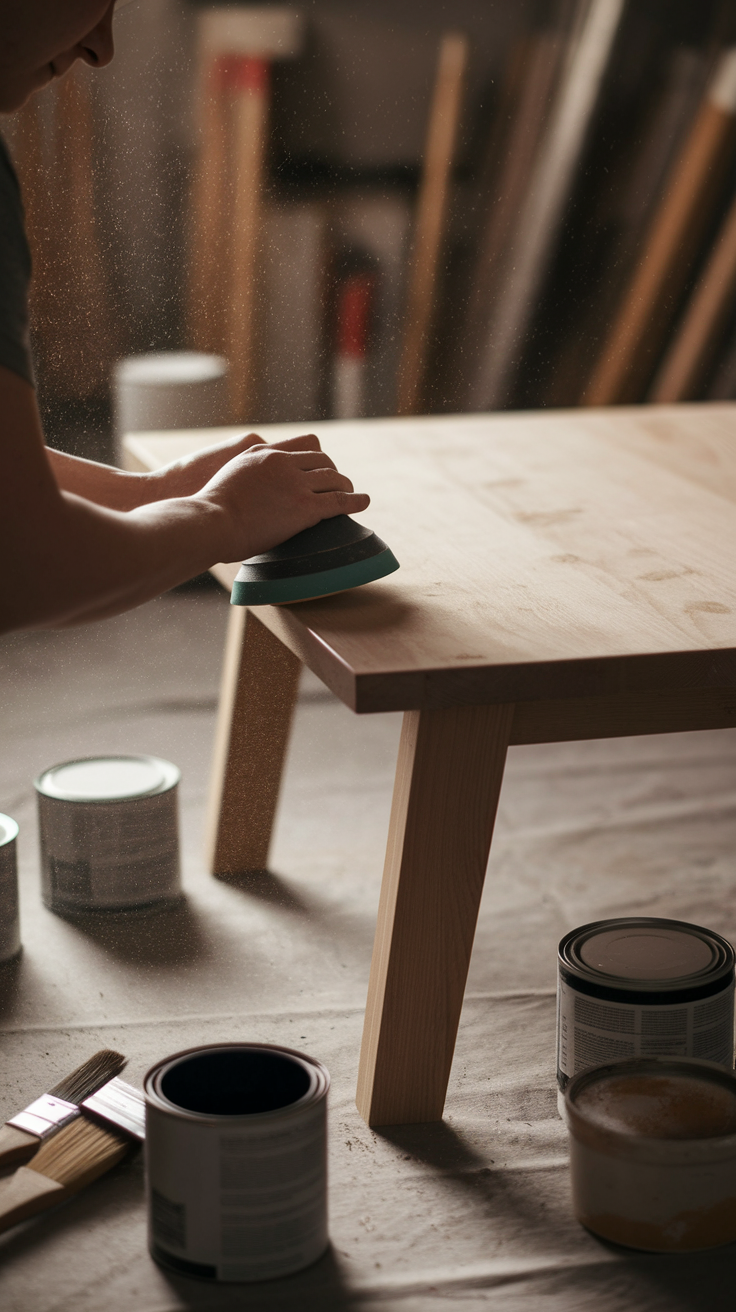
Sandpaper or electric sander – for stripping off old finishes.
-
Wood filler or putty – to fill in any holes or imperfections before painting or staining.
-
Paintbrushes & rollers – better quality = smoother finish.
-
Spray paint – great for quick and even coverage, especially on metal or detailed surfaces.
-
Primer & paint/stain – choose based on the look you want.
-
Sealant – protects your masterpiece from scratches and spills.
-
New hardware – knobs, pulls, or hinges make a huge difference.
-
Glue & clamps – to fix wobbly or loose joints.
That’s pretty much it. Unless you’re secretly a carpenter, you can skip the fancy gadgets.
Easy Upcycling Ideas
There are many creative ways and DIY projects to upcycle old furniture. Here’s where you get to flex your creative muscles.
Paint It New
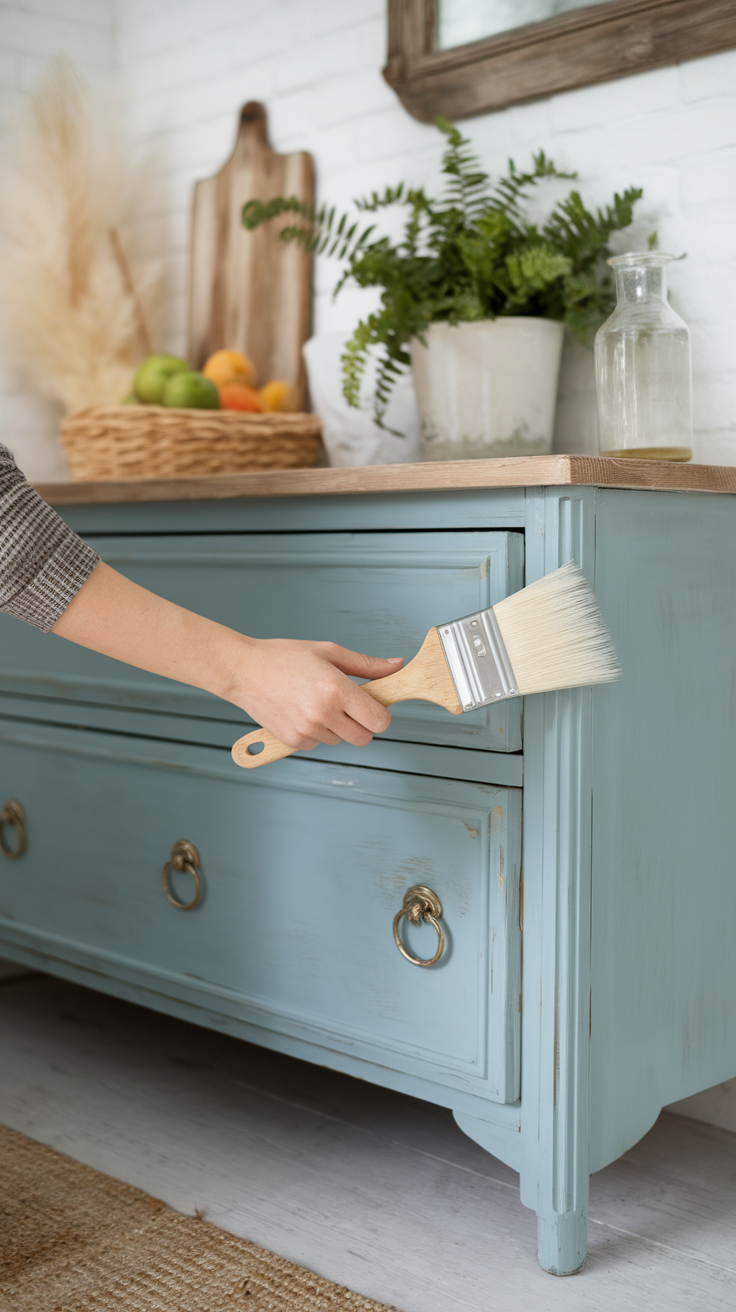
Never underestimate the power of paint. The process of transforming furniture involves preparing the surface, painting, and finishing to achieve a professional look. Want farmhouse charm? Go for chalk paint. For a distressed, vintage effect, edges can be lightly sanded after painting. Dreaming of modern chic? Matte black is your friend.
Switch Out Hardware
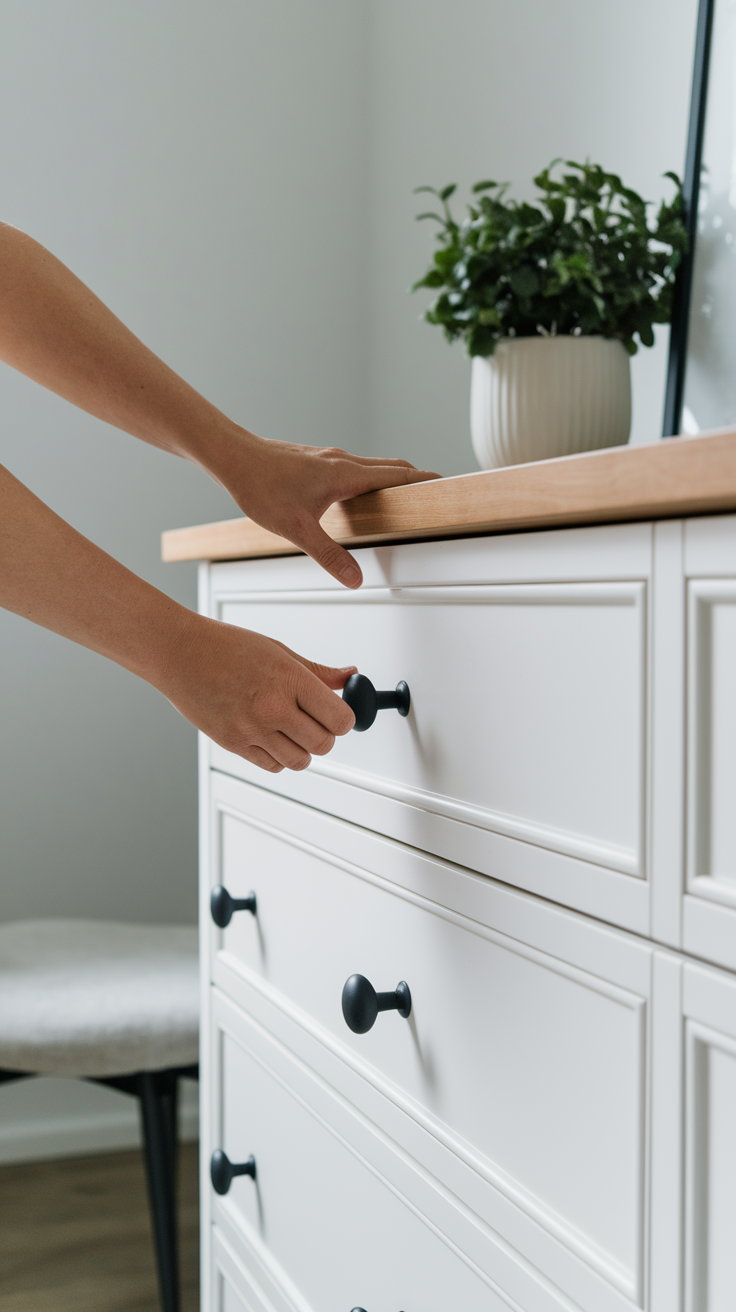
Swapping knobs and handles might sound basic, but it’s one of the fastest ways to modernize a piece. I once swapped brass handles for sleek matte black pulls, and my dresser instantly looked like boutique furniture.
Add Patterns or Wallpaper
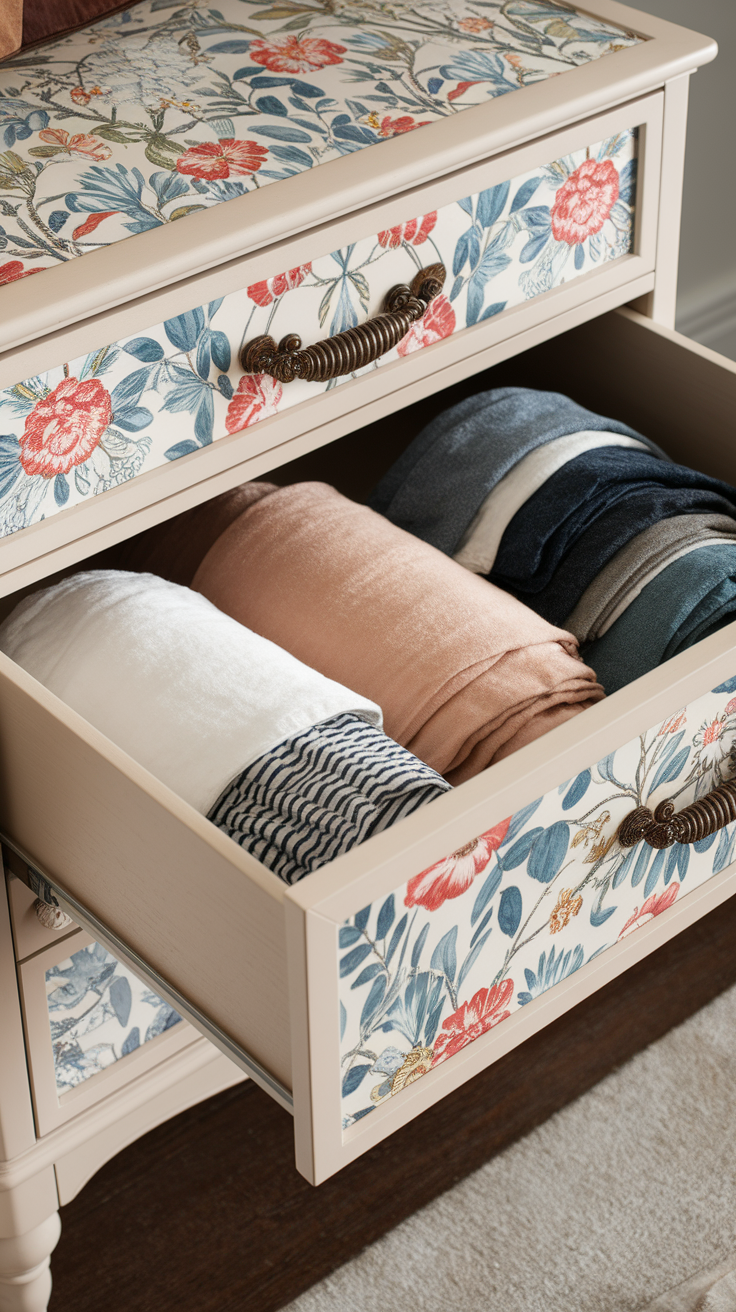
Stencils, painter’s tape, or even wallpaper inside drawers = instant “designer” vibes. Bonus: it hides scratches. Once the piece is decorated with patterns or wallpaper, you can further enhance its look by adding decorative items or accessories, such as small plants, stylish knobs, or framed photos.
Repurpose It
Here’s where things get fun. Who says a dresser has to stay a dresser? Old furniture is like clay—you can mold it into whatever you need.
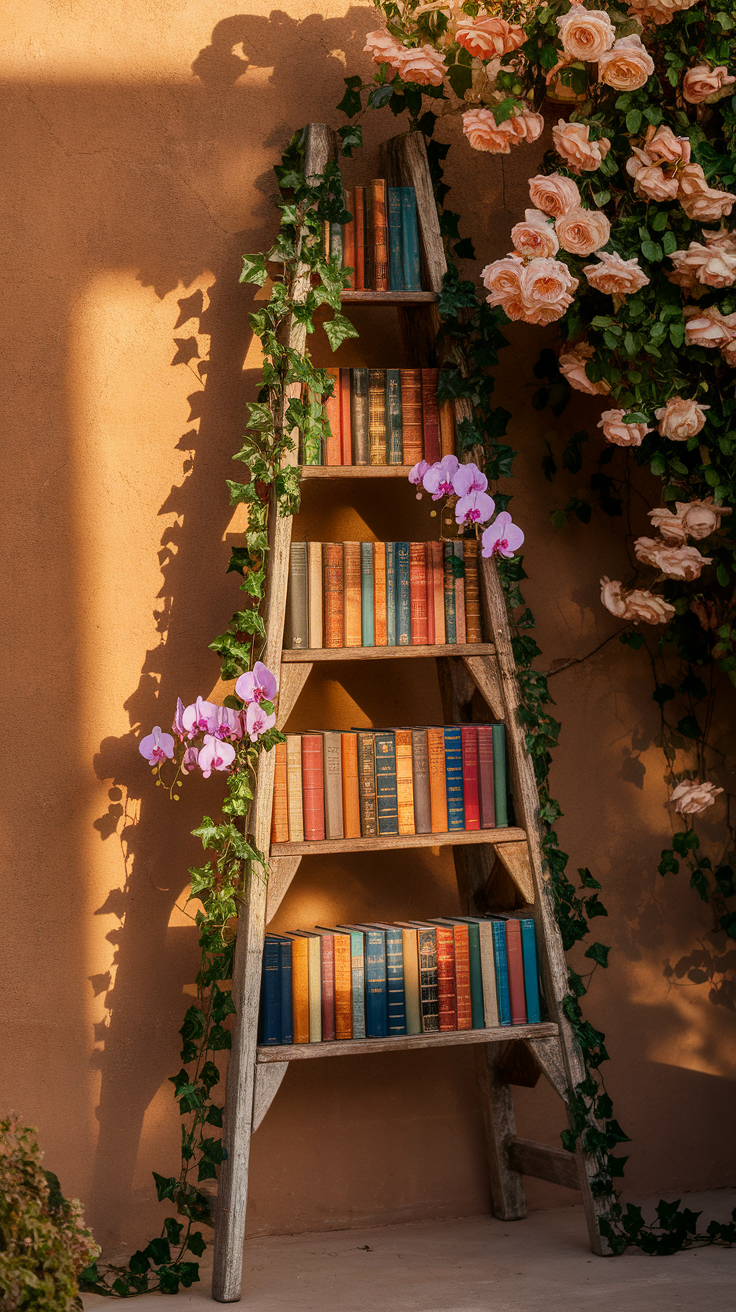
That desk collecting dust in the garage? Boom, instant vanity for your bedroom. That kitchen table that’s too small for family dinners? Cut it down and turn it into a sleek console table. Even an old ladder can become quirky shelving for plants, books, or (if you’re like me) the random knick-knacks you can’t seem to throw away.
Want storage? Add shelves. Need a drop zone for bags and keys? Attach hooks. Got a wobbly chair? Toss a cushion on it and make it a funky little reading nook. Heck, I once saw someone turn a vintage suitcase into a dog bed—talk about style with personality.
The beauty of repurposing is that there are no rules. You’re not just giving a piece a new look; you’re giving it a whole new purpose. And honestly, half the fun is surprising yourself with what it becomes.
Tips for a Flawless Finish
Want your furniture to look less DIY fail and more interior-magazine chic? Follow these tips:
-
Sand first. Paint won’t stick to shiny, smooth finishes.
-
Prime it. Don’t skip this—primer saves you from streaky results.
-
Apply thin coats. Thick layers = gloopy mess. Be patient.
-
Seal it. A clear topcoat keeps your piece looking fresh.
-
Check the lighting. Colors look different in daylight vs. indoors. Trust me, I learned the hard way.
-
Leave some of the rest. Sometimes, leaving part of the original finish untouched lets the rest of the piece's character and history shine through.
-
Make it art. Finishing a piece can be an art form—use creative techniques to express your style and turn your project into a unique accent.
Mistakes to Avoid
Even seasoned upcyclers mess up sometimes (yep, I’ve been there). Avoid these rookie moves:
-
Doing too much. Sometimes less is more.
-
Skipping repairs. Paint won’t fix wobbly legs.
-
Rushing. Drying time exists for a reason.
-
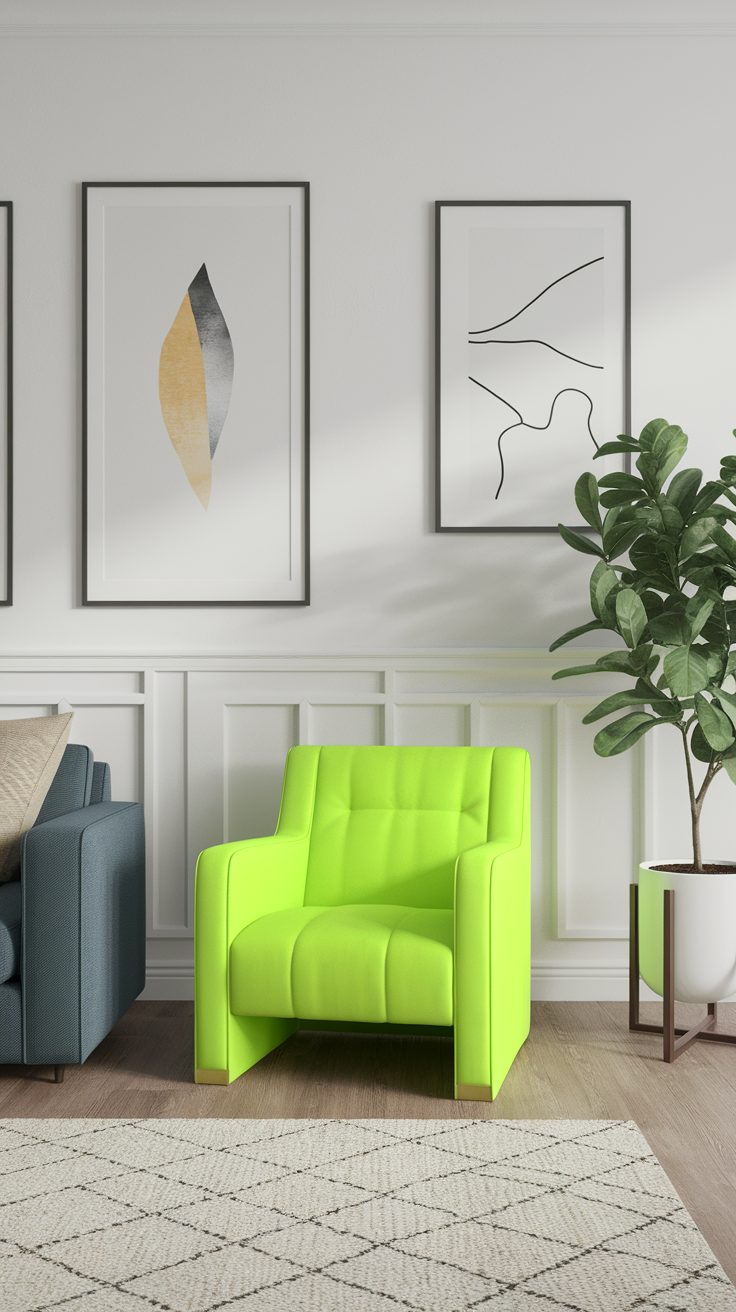
Ignoring the room’s vibe. A neon green dresser might look cool… until it clashes with your entire space.
Where to Show Off Your Masterpieces
Once you’ve upcycled, where do your creations shine best?
-
Living room: Accent chairs, side tables, coffee tables.
-
Bedroom: Nightstands, headboards, dressers.
-
Entryway: Benches, coat racks, console tables.
-
Garden/patio: Old chairs repurposed as planters or quirky outdoor seating.
Wall-mounted shelves or hooks are a great way to display your upcycled creations, making use of wall space to showcase decorative or functional pieces.
Warning: once you start, friends and family will ask you to “fix up” their old pieces. ;)
Personal Story: My Favorite Project
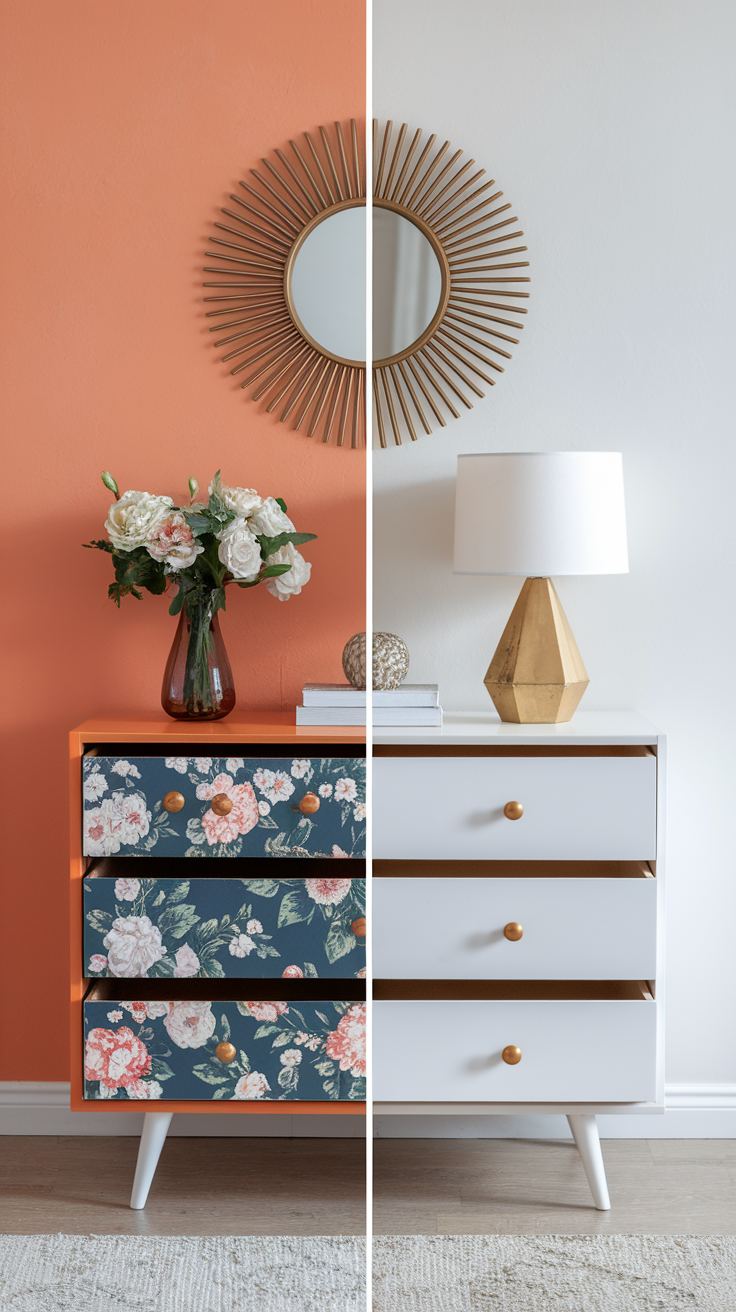
I once bought a hideous, orange-toned dresser for $25. After sanding, I painted it crisp white, swapped the knobs for brushed gold, and lined the drawers with floral wallpaper. The end result looked like something straight out of Anthropologie—minus the $400 price tag. Total cost? About $40.
That dresser is still in my room today, and honestly, it’s my favorite conversation starter. Proof that ugly ducklings really can turn into swans.
Why Upcycling Beats Buying New
Let’s do a quick comparison:
-
Buying new: Expensive, mass-produced, and lacking character.
-
Upcycling: Affordable, unique, sustainable, and gives you bragging rights. Upcycled furniture not only stands out as a creative and eco-friendly choice, but also gives old pieces a second life by transforming them into stylish, functional items.
Which one sounds better? (Hint: the second option.)
FAQs About Upcycling Furniture
How to repurpose old furniture?
Look at what you have and think outside the box. The process of upcycling involves several creative steps—preparing, painting, and finishing your piece. A dresser can become a bathroom vanity, a ladder can become shelving, and a chair can become a plant stand. Focus on function first, then add style.
What is the most profitable upcycle?
Furniture flips are especially popular, with many upcycled pieces sold for a profit. Dressers, chairs, and side tables usually flip for the highest profit. They’re practical, in demand, and transform easily with paint and hardware.
What is the app for upcycling furniture?
Pinterest is great for inspiration, while Facebook Marketplace, Freecycle, and OfferUp are perfect for sourcing cheap finds—or selling your finished projects. FYI, most upcyclers live on Marketplace.
What paint to use when upcycling furniture?
Chalk paint is beginner-friendly and gives a soft matte finish. Acrylic or latex paints work well for a modern look. Always use primer first and sealant last to keep your piece durable.
Conclusion
So, there you go—how to upcycle old furniture into beautiful décor without breaking the bank. Whether you paint, repurpose, or just swap out some knobs, each project gives you something fresh, functional, and totally unique.
And let’s be honest: isn’t it way more fun to brag about your creative genius than admit you spent three hours assembling a flat-pack nightmare?
Next time you’re about to toss an old piece, grab some sandpaper instead. Who knows? That “junk” could become the centerpiece of your home. :)